
The parking method for cross-stitch, explained
Parking is a way to stitch charts with many colors block by block, 'parking' each thread in the next block until you need it. How to do it, step by step.
By The Hoop & Paw team · Published · 2 min read
Parking is a way to stitch charts with lots of colors — like pet portraits — without constantly finishing and restarting threads. You stitch one small area completely, and instead of ending each color, you park it where it's needed next.
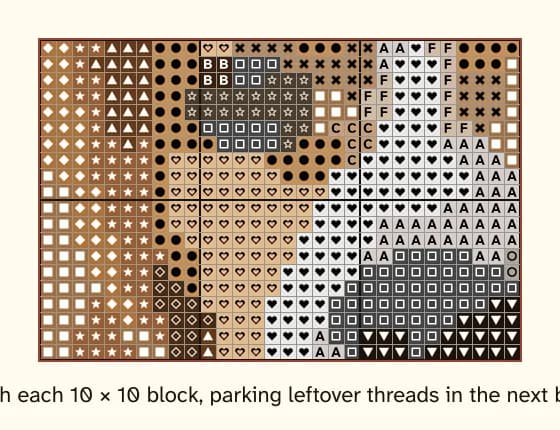
How it works
- Divide the chart into 10 × 10 blocks (most charts already show them with bold lines).
- Start with the top-left block. Thread a needle for each color in that block — many parkers keep several needles going at once.
- Stitch every square of one color in the block, then bring the needle up at the next place that color appears in the next block (or the row below) and leave it hanging there: it's parked.
- Do the same for every color in the block, until the block is complete.
- Move to the next block. Your threads are already waiting in the right places.
Cross-country vs. parking
- Cross-country stitching completes one color over a big area before switching. Quick for patterns with large areas of one color.
- Parking completes one area at a time. Better for photo-style patterns with many colors and some confetti.
Many stitchers mix the two: parking in the face and fur, cross-country for a plain background.
Tips
- Keep parked threads on the front, away from the area you're stitching, so they don't get caught.
- Mark each finished block on your chart (or in a chart-tracking app on a tablet) so you never lose your place.
- If a parked thread would need to travel more than a block, finish it and start fresh later.
Patterns with less confetti need less parking. See confetti stitches for how clean-up reduces them.